How-to Build a Custom Form
There are free custom form templates that you may use to manipulate to your liking. If you are needing a Limo Anywhere agent to create you a form from scratch it will cost $249 per form. The free custom forms links are located at the bottom of this Knowledge Base article.
- Click on the ‘My Office‘ icon in the toolbar.
- Select the ‘Custom Forms‘ tab.
- There are two main types of Custom Forms that can be created:
- Trip Email & Print are forms sent from the Reservation screen such as Confirmations, Trip Sheets, and Payment Receipts.
- Invoice Email & Print are forms sent from the ‘Receivables’ section such as Invoices.
IMPORTANT: Build the Custom Form in the correct section as determined by its use.
In the example below a simple Standard Confirmation will be built as a Custom Form using the CFM WYSIWYG (What You See Is What You Get editor).
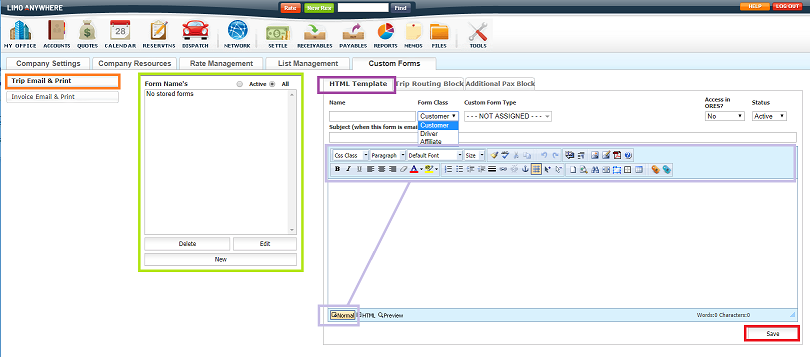
- The ‘Form Names‘ box stores the different forms for you to chose from (green box).
- ‘New‘ button allows you to start a new form (blue box).
- The ‘HTML Template‘ tab is where you would create the main portion of the custom form (purple box).
- The ‘Normal‘ or ‘WYSIWYG‘ editing tool bar will assist you with editing/setting up your custom forms (lavender box).
- The ‘Form Class‘ drop down list flags the form to only be sent to that type recipient: ‘Customer‘, ‘Driver‘, or ‘Affiliate‘.
- Click the ‘Save‘ button to retain what has been entered to this point (red box).

- Enter the ‘Name‘ of the form.
- Enter the The ‘Form Class‘ from the drop down list based on what group this form will be sent to: ‘Customer‘, ‘Driver‘, or ‘Affiliate‘.
- Click the ‘Tag‘ icons on the WYSIWIG editor (orange) as illustrated below.
NOTE: The ‘Brownish-Orange Tag‘ icon will display a list of the ‘Trip Tags‘ that can be utilized in the HTML Template. The ‘Blue Tag‘ icon will display a list ‘Rate Tags‘ that can be utilized in the HTML Template.
HINT: Drag the Tag pop up window to the left so that it is adjacent to the HTML Template area (highlighted blue). That way as the template is instructed it is easy to insert the tag in the appropriate space by simply clicking on the Tag.
- Enter the Subject. This field will populate the subject line of the email. It is important to have something here because many email hosts will block or categorize the email as SPAM when a subject line is blank. You can also use the Hash Tags to the subject line.
Building the Custom Form can now begin.
One of the best ways to build a Custom Form is by using ‘Tables‘. Tables help align and group the data and make the form more readable. This is the method that will be illustrated here.
- Click the ‘Table’ icon on the WYSIWIG tool bar as illustrated below to create a Table. This will open the table construct pop up.
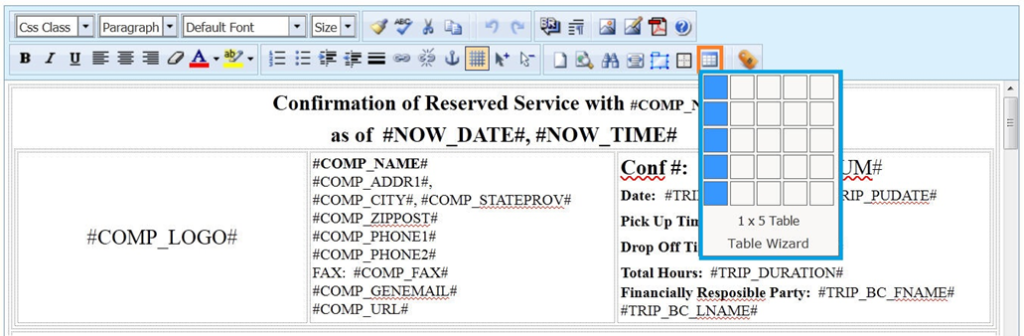
- Select 1 column for the first table. Estimate the number of rows based on the form being created. In this case we start with 5.
- The best way to build the form is to place a table within the table for each section. Click to put the mouse cursor in the first row. Click the table icon again and this time we select 1 row and 3 columns.
- Then the row is populated by typing the text and then clicking on the tag at the appropriate place. In this case the top of the form with a title line, the company info and some basic information about the trip such as confirmation numbr and pick-up day, date and time. The first row in the main table looks like this.
HELPFUL HINT: Either text or tags can be made bold, italicized, or underlined; colored or highlighted, or the orientation with in the cell (left, center, or right) by clicking text editing tools highlighted below in orange. The font or size of the text can be changed by using the editing tools highlighted below in blue.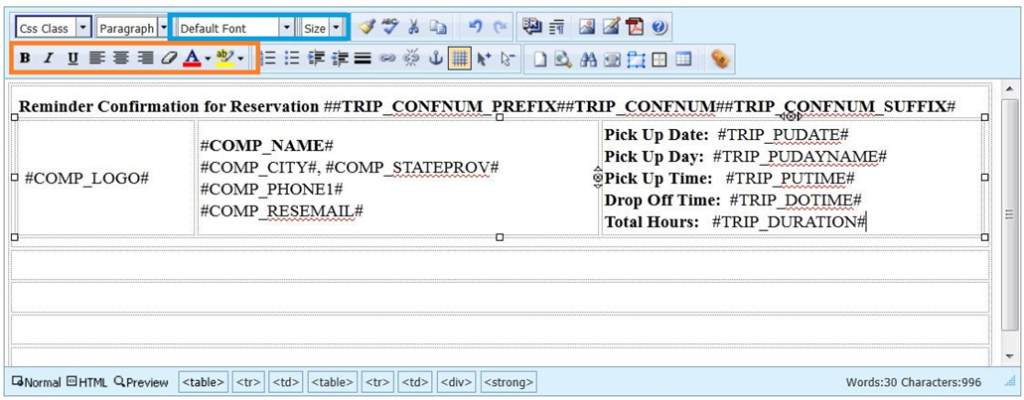
- Move the mouse cursor to the next (2nd) row of the main table and click there. Click the table icon. In this case 1 row and 2 columns are selected.
- The two cells in this row are populated by typing the text, and then clicking on the tag at the appropriate place. In this case the top of the cell has labels for the two cells in the sub table of Bill To Information, and Passenger Information. The cells of the sub table are populated with the names and contact information of the Billing Contact and Primary Passenger. The second row in the main table looks like this.
HELPFUL HINT: When a string of text and tags spans two lines in a cell (highlighted above in orange) that does not mean the data will necessarily display on two lines. To move to a new line hit the Enter key to start a new line.
- Move the mouse cursor to the next (3rd) row of the main table and click there. Click the table icon. In this case 1 row and 2 columns are selected.
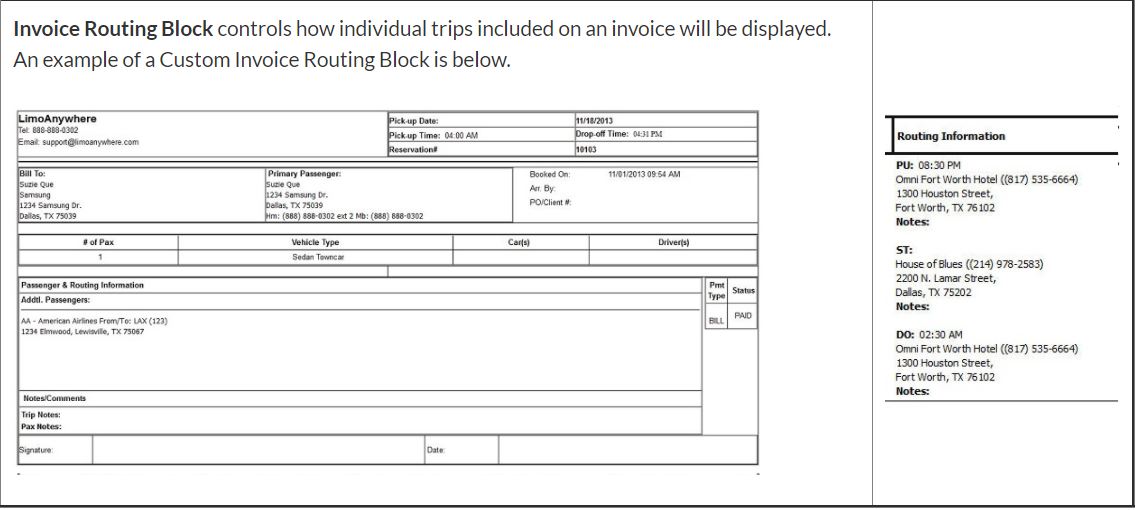
- The two cells in this row are populated by typing the text, and then clicking on the tag at the appropriate place. In this case the top of the cell has labels for the two cells in the sub table of Trip Information, and Routing Information. The third row in the main table looks like this.
HELPFUL HINT: The trip routing can be populated by using individual Trip Routing Block tags for Pick-up, Stop, Waiting, or Drop-off. For example the Trip Routing Block for Pick-up is #TRIP_RT_PUBLOCK#. A shortcut is to use the tag highlighted above in orange that will populate the cell with all elements of the trip routing.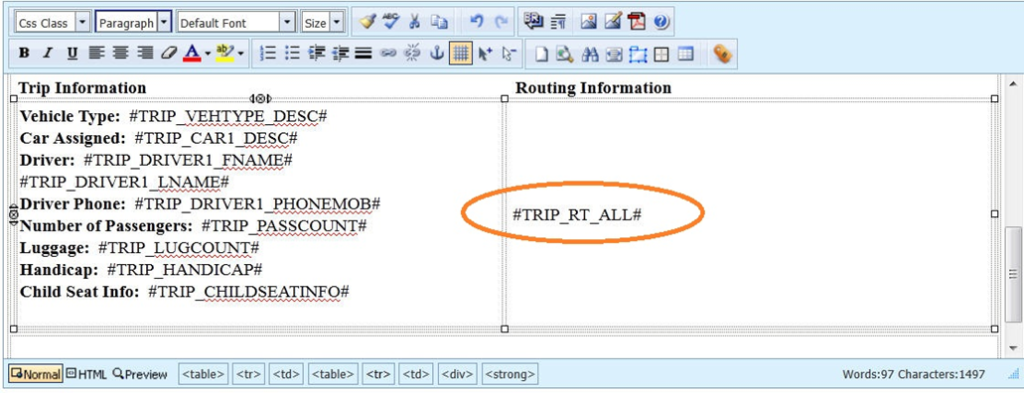
- Move the mouse cursor to the next (4th) row of the main table and click there. Click the table icon. In this case 1 row and 2 columns are selected.
- In this example another table is inserted in the first cell in row 4. Click the table icon. In this case 1 row and 2 columns are selected.
- The two cells in this row are populated by typing the text, and then clicking on the tag at the appropriate place. In this case the top of the cell has labels for the two cells in the sub table of Rate & Payment Information, and Trip Notes. The fourth row in the main table looks like this.
HELPFUL HINT: When a table is created within a table a space will be created at the top to add a title to that table. To remove this spacing enter any text in that space, and then backspace to remove the text. The the interior table can be expanded to fill the cell of the exterior table by dragging the boarders of the table.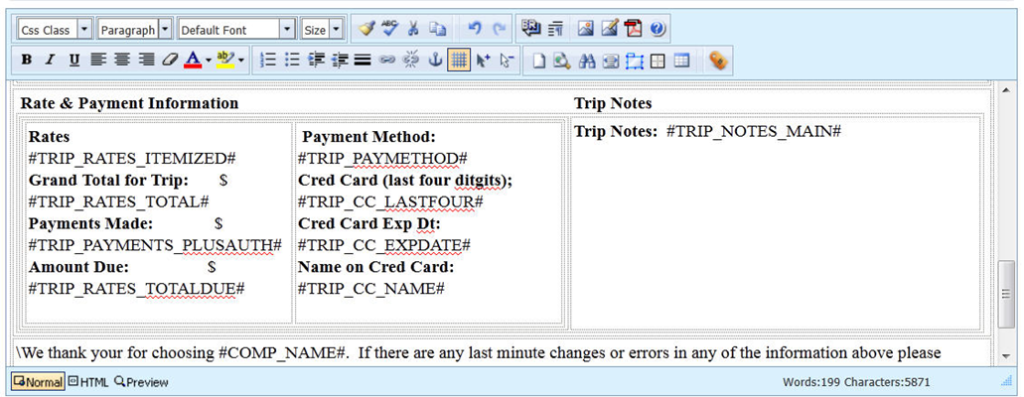
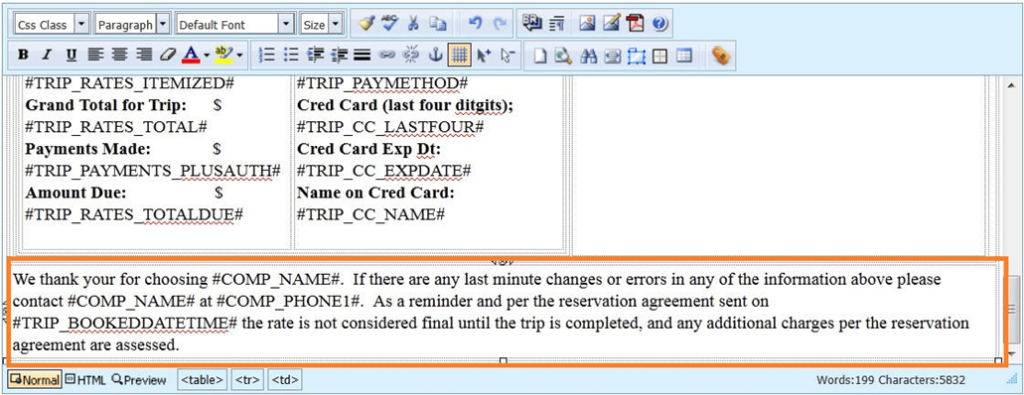
- Move the mouse cursor to the next (5th) row of the main table and click there.
- Enter the text and tags to close or summarize this document. The fifth row looks like this.
- Click the ‘Save‘ button to retain any entries.
HELPFUL HINT: It is a good idea to save after each row to minimize the potential of losing the text and tags entered. Anytime a Custom Form template is saved it will redisplay in the edit form box for continued editing.
Custom Blocks
Using Custom Blocks is a good way to ensure that each time the information appears in a custom form it appears the same way. Custom Blocks also allow the customization of a display of information to appear as a given client would like it.
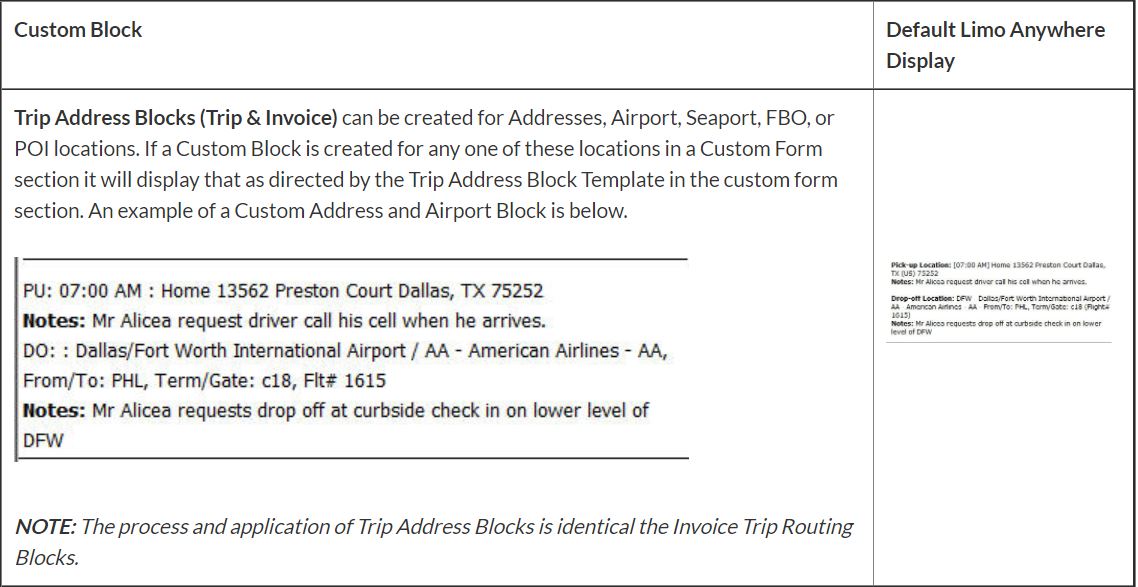
The below chart illustrates the various Custom Blocks that can be built, and the default information they would replace.
Creating a Custom Trip/Invoice Block
- Click on the ‘My Office‘ icon in the toolbar.
- Select the ‘Custom Forms‘ tab.
- Open either the ‘Trip Email & Print‘ or ‘Invoice Email & Print‘ to find the form.
- The Custom Form will appear in the ‘Form Names‘ list.
- Select the form that needs the blocks added to it.
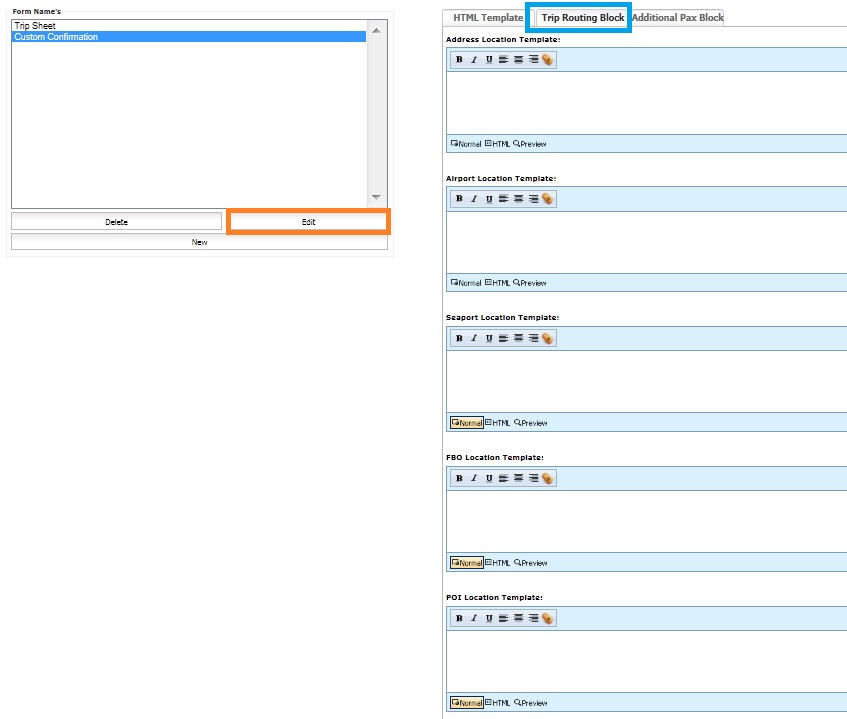
- Click the ‘Edit‘ button.
- Select the ‘Trip Routing Block‘ tab. Helpful Hint: Customized Trip Routing Blocks may be used with a number of different forms. Because it is likely that for an address pick up point the same information would need to be communicated if the form was a Driver Trip Sheet or Customer Confirmation. Once these blocks have been built they can be copied and pasted into other forms.
- There are Trip Routing Block Templates for:
- Address Locations
- Airport Locations
- Seaport Locations
- FBO (Private Aviation) Locations
- POI (Points of Interest) Locations
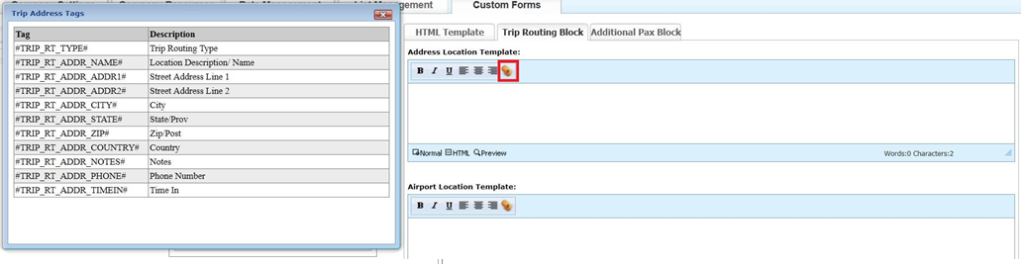
- Click the ‘Tag‘ icon to display the Trip Address Tags that can be utilized in the Address Location Template.
HINT: Drag the Trip Address Tag pop up to the left so that it is adjacent to the Address Location Template area. That way as the template is constructed it is easy to insert the tag in the appropriate space.
- Begin building the Address Location Template by adding Tags and Text including spacing and punctuation. Tags are added by clicking the Tag (surrounded by #) in the Trip Address Tags pop up.
- Repeat this process as needed for each of the other Trip Routing Blocks.
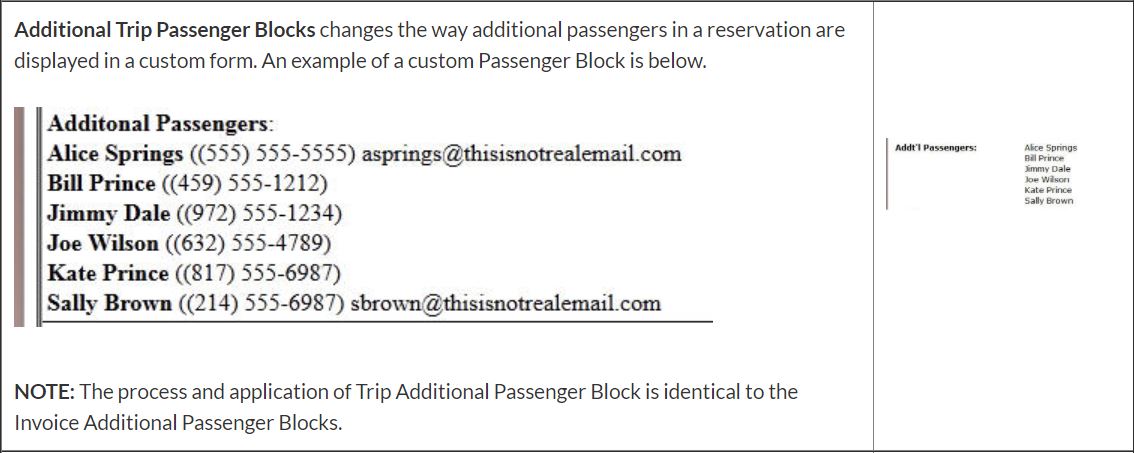
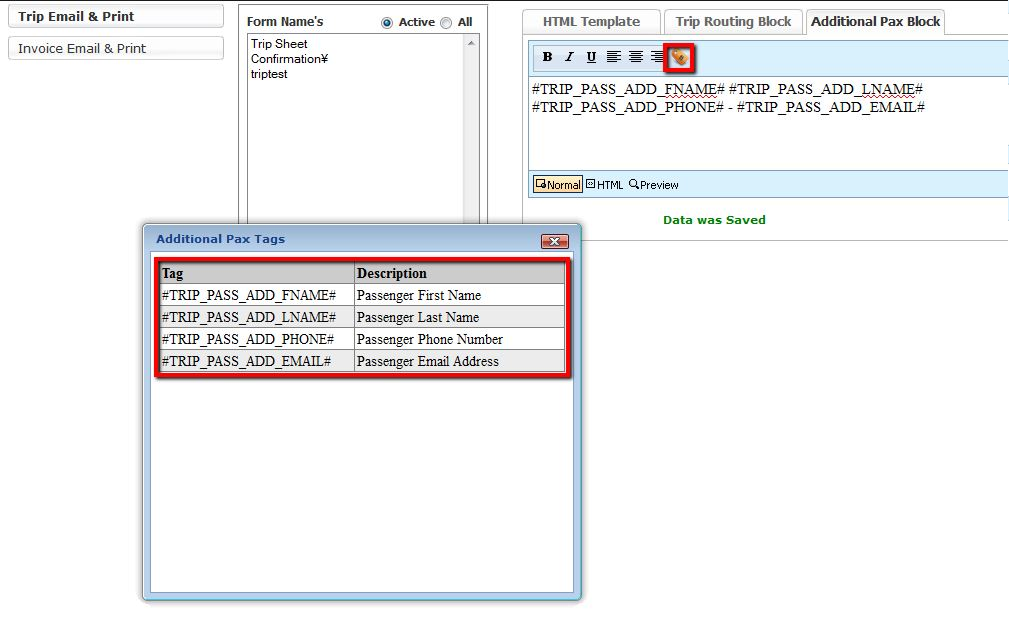
- Select the Additional Passenger Block tab and repeat this process to build a custom format for displaying additional passengers in a custom form as illustrated below.
- Click the ‘UPDATE‘ button to save the changes.
For more information over the free custom forms templates please see the Knowledge Base article ‘Free Custom Form Templates‘.
